Species tool: Version 1 (toolbox)
Now we have our custom Toolbox in ArcGIS but it cannot yet do anything. Let’s first create a graphical user interface for our tool.
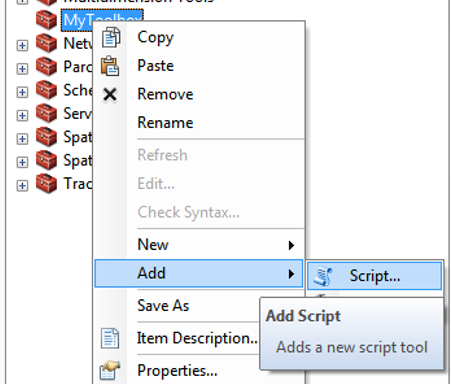
Defining input/output files plus additional parameters for your own Python script can be done by creating a Script -tool (i.e. user interface) into your ArcGIS toolbox:
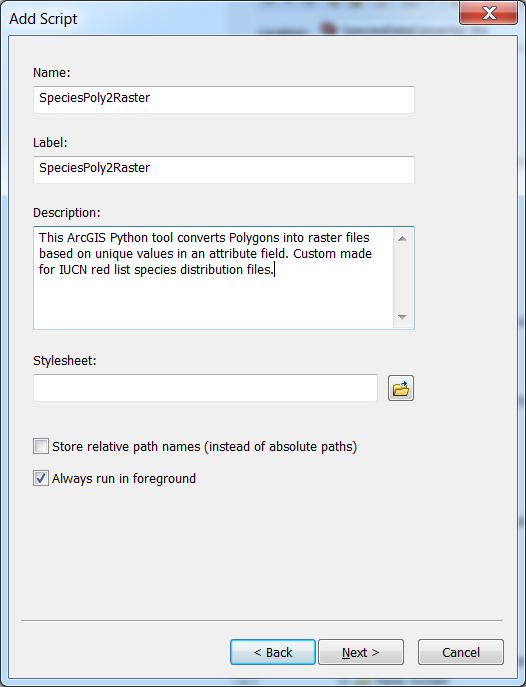
It opens a dialog where you should write some generic description of your tool such as the name of the tool and description for it (do like below):
Click Next, and ignore the Script File -field for now (click Next again).
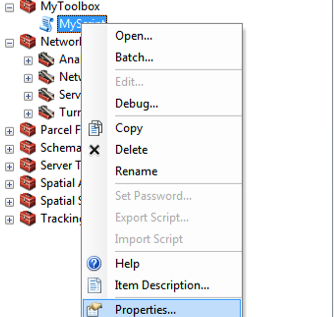
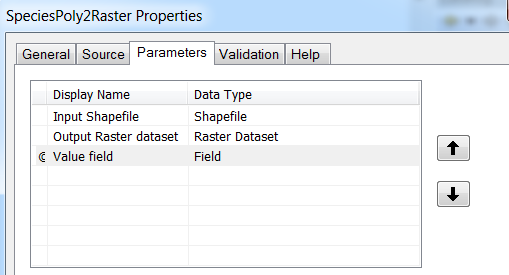
Now we can add parameters to our tool which are then asked from the user when the tool is used. Parameters can be defined from the properties of your Script tool:
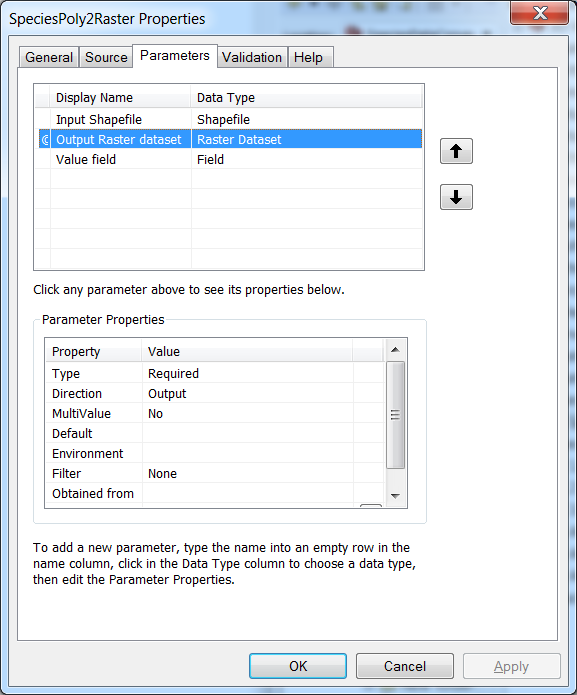
From the Parameters -tab we can add the required parameters to our tool.
We can name the paramater as we like in Display name column. The Data type column determines what kind of input the user can
pass to that specific parameter. It can be for example Shapefile, Folder, Field, Integer, or a Raster (see the full list by clicking a row at Data Type column).
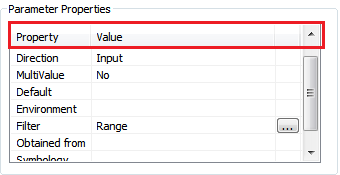
From the lower part of the dialog we can adjust the properties of individual parameter (selected in Parameters list, above) that we have added to our tool. We can for example determine the
Direction of the parameter (Input or output), determine with `Filter what kind of values are valid for the parameter (e.g. list of values or range), or specify a Default value for a parameter:
You need to do these modifications in the lower pane:
- for
Output Raster datasetsetDirectionasOutput - for
Value field, setObtained fromasInput_Shapefile
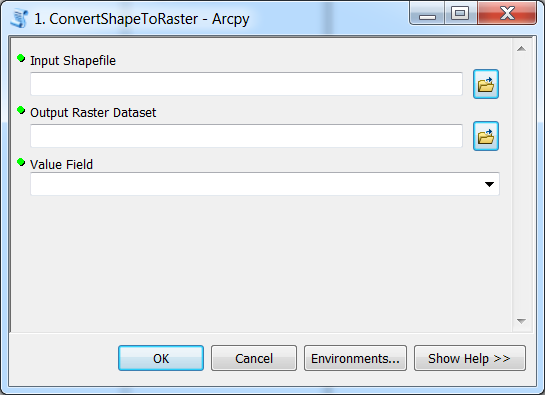
Finally, you should end up having a nice interface for your tool that looks something similar as this:
Next, we need to write the Python script that we run with this tool interface!
