ArcGIS Toolbox
Creating an ArcGIS Toolbox for Python scripts
Now as we know how to use/access Python in ArcGIS, let’s start our arcpy demo by creating a Toolbox for our scripts.
A Toolbox is a Graphical User Interface for using specific tools in ArcGIS:
- Setting input/output files
- Setting parameters
It is also possible and recommendable to create your own toolbox for the Python scripts that you have created, although it is possible to run your Python script also without one.
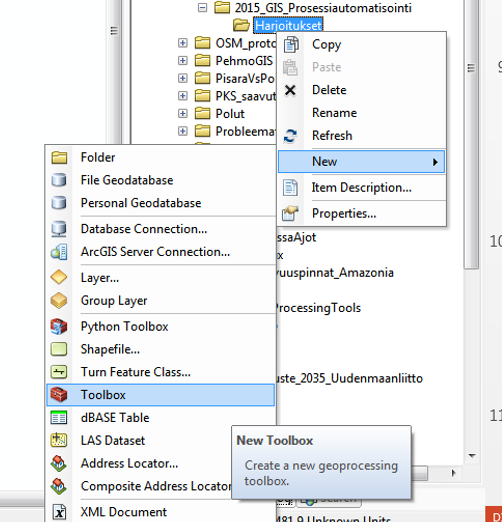
Creating a ArcGIS Toolbox is easy. Just open the file catalog panel in ArcGIS (i.e. file explorer of ArcGIS), press right mouse on a location where you want to save your toolbox, and choose New –> Toolbox. Let’s create
a toolbox called ProcessChains.tbx and save it into the computer (put it into a folder where you can easily find it).
Opening the toolbox in ArcGIS
Now you have should have an empty toolbox saved on a disk. We can import the toolbox easily. Add ProcessChains.tbx to ArcGIS with three simple steps:
- activate ArcToolbox panel
- right click in white space
- Add Toolbox (browse to the directory where you save your toolbox)
Defining the toolbox functionalities
Now we have our custom Toolbox in ArcGIS but it cannot yet do anything. Let’s first create a graphical user interface for our tool.
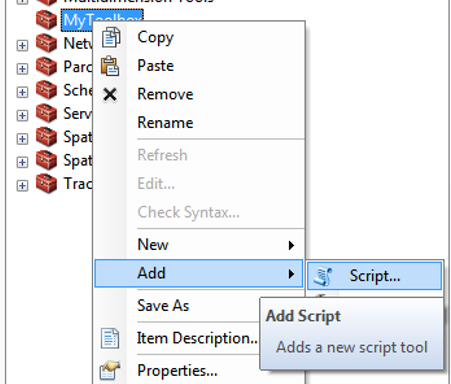
Defining input/output files plus additional parameters for your own Python script can be done by creating a Script -tool (i.e. user interface) into your ArcGIS toolbox:
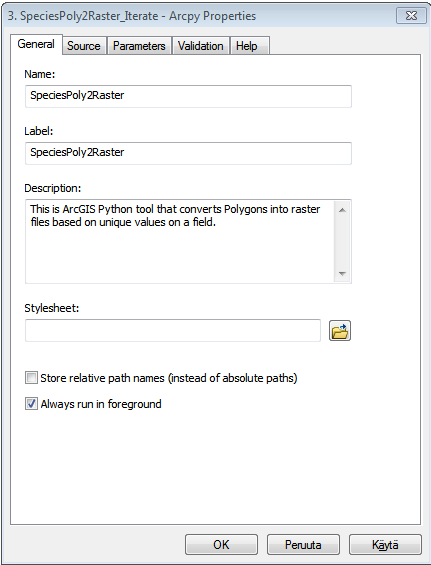
It opens a dialog where you should write some generic description of your tool such as the name of the tool and description for it (do like below):
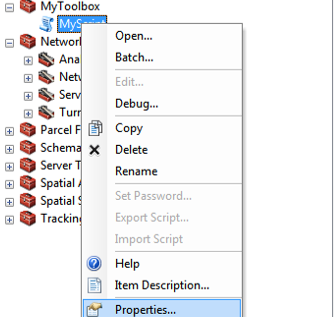
Now we can add parameters to our tool which are then asked from the user when the tool is used. Parameters can be defined from the properties of your Script tool:
From the Parameters -tab we can add different kind of parameters to our tool.
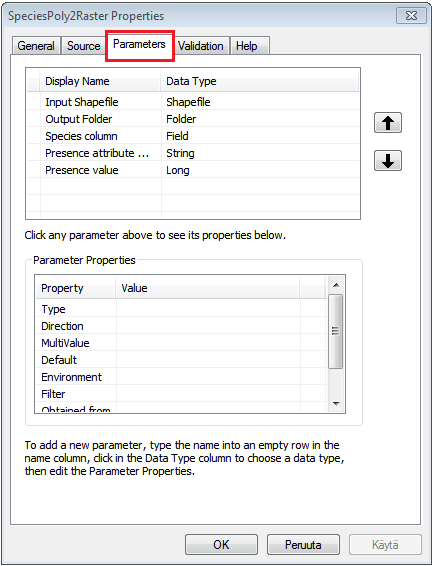
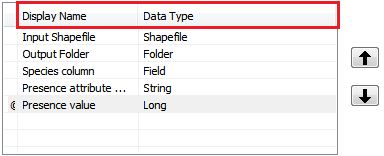
We can name the paramater as we like in Display name column. The Data type column determines what kind of input the user can
pass to that specific parameter. It can be for example Shapefile, Folder, Field, Integer, or a Raster (see the full list by clicking a row at Data Type column). Create following parameters:
From the lower part of the dialog we can adjust the properties of individual parameter (selected in Parameters list, above) that we have added to our tool. We can for example determine the
Direction of the parameter (Input or output), determine with `Filter what kind of values are valid for the parameter (e.g. list of values or range), or specify a Default value for a parameter:
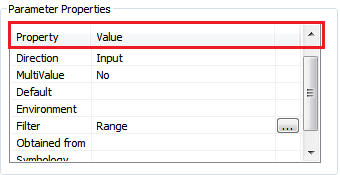
Task
Determine the Filter parameter for Presence value as a range of values from 1-5.
Finally, you should end up having a nice interface for your tool that looks something similar as this:
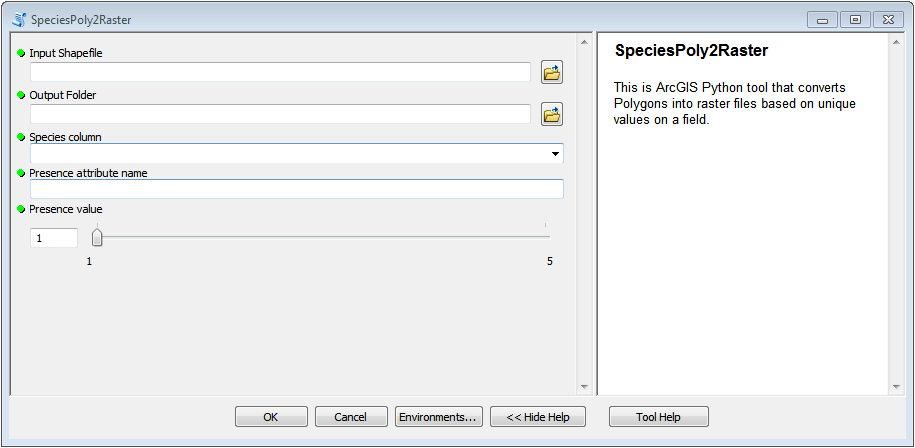
Next, we need to write the Python script that we run with this tool interface!